Step 3 - Layout
ALL HOW TO GUIDE ARTICLES
If you haven't already go back to Step 2 - Template and import, and scroll down to where it shows you how you flag all the recipes you would like to feature in your cookbook and how to import them ready for Step 3 - layout.
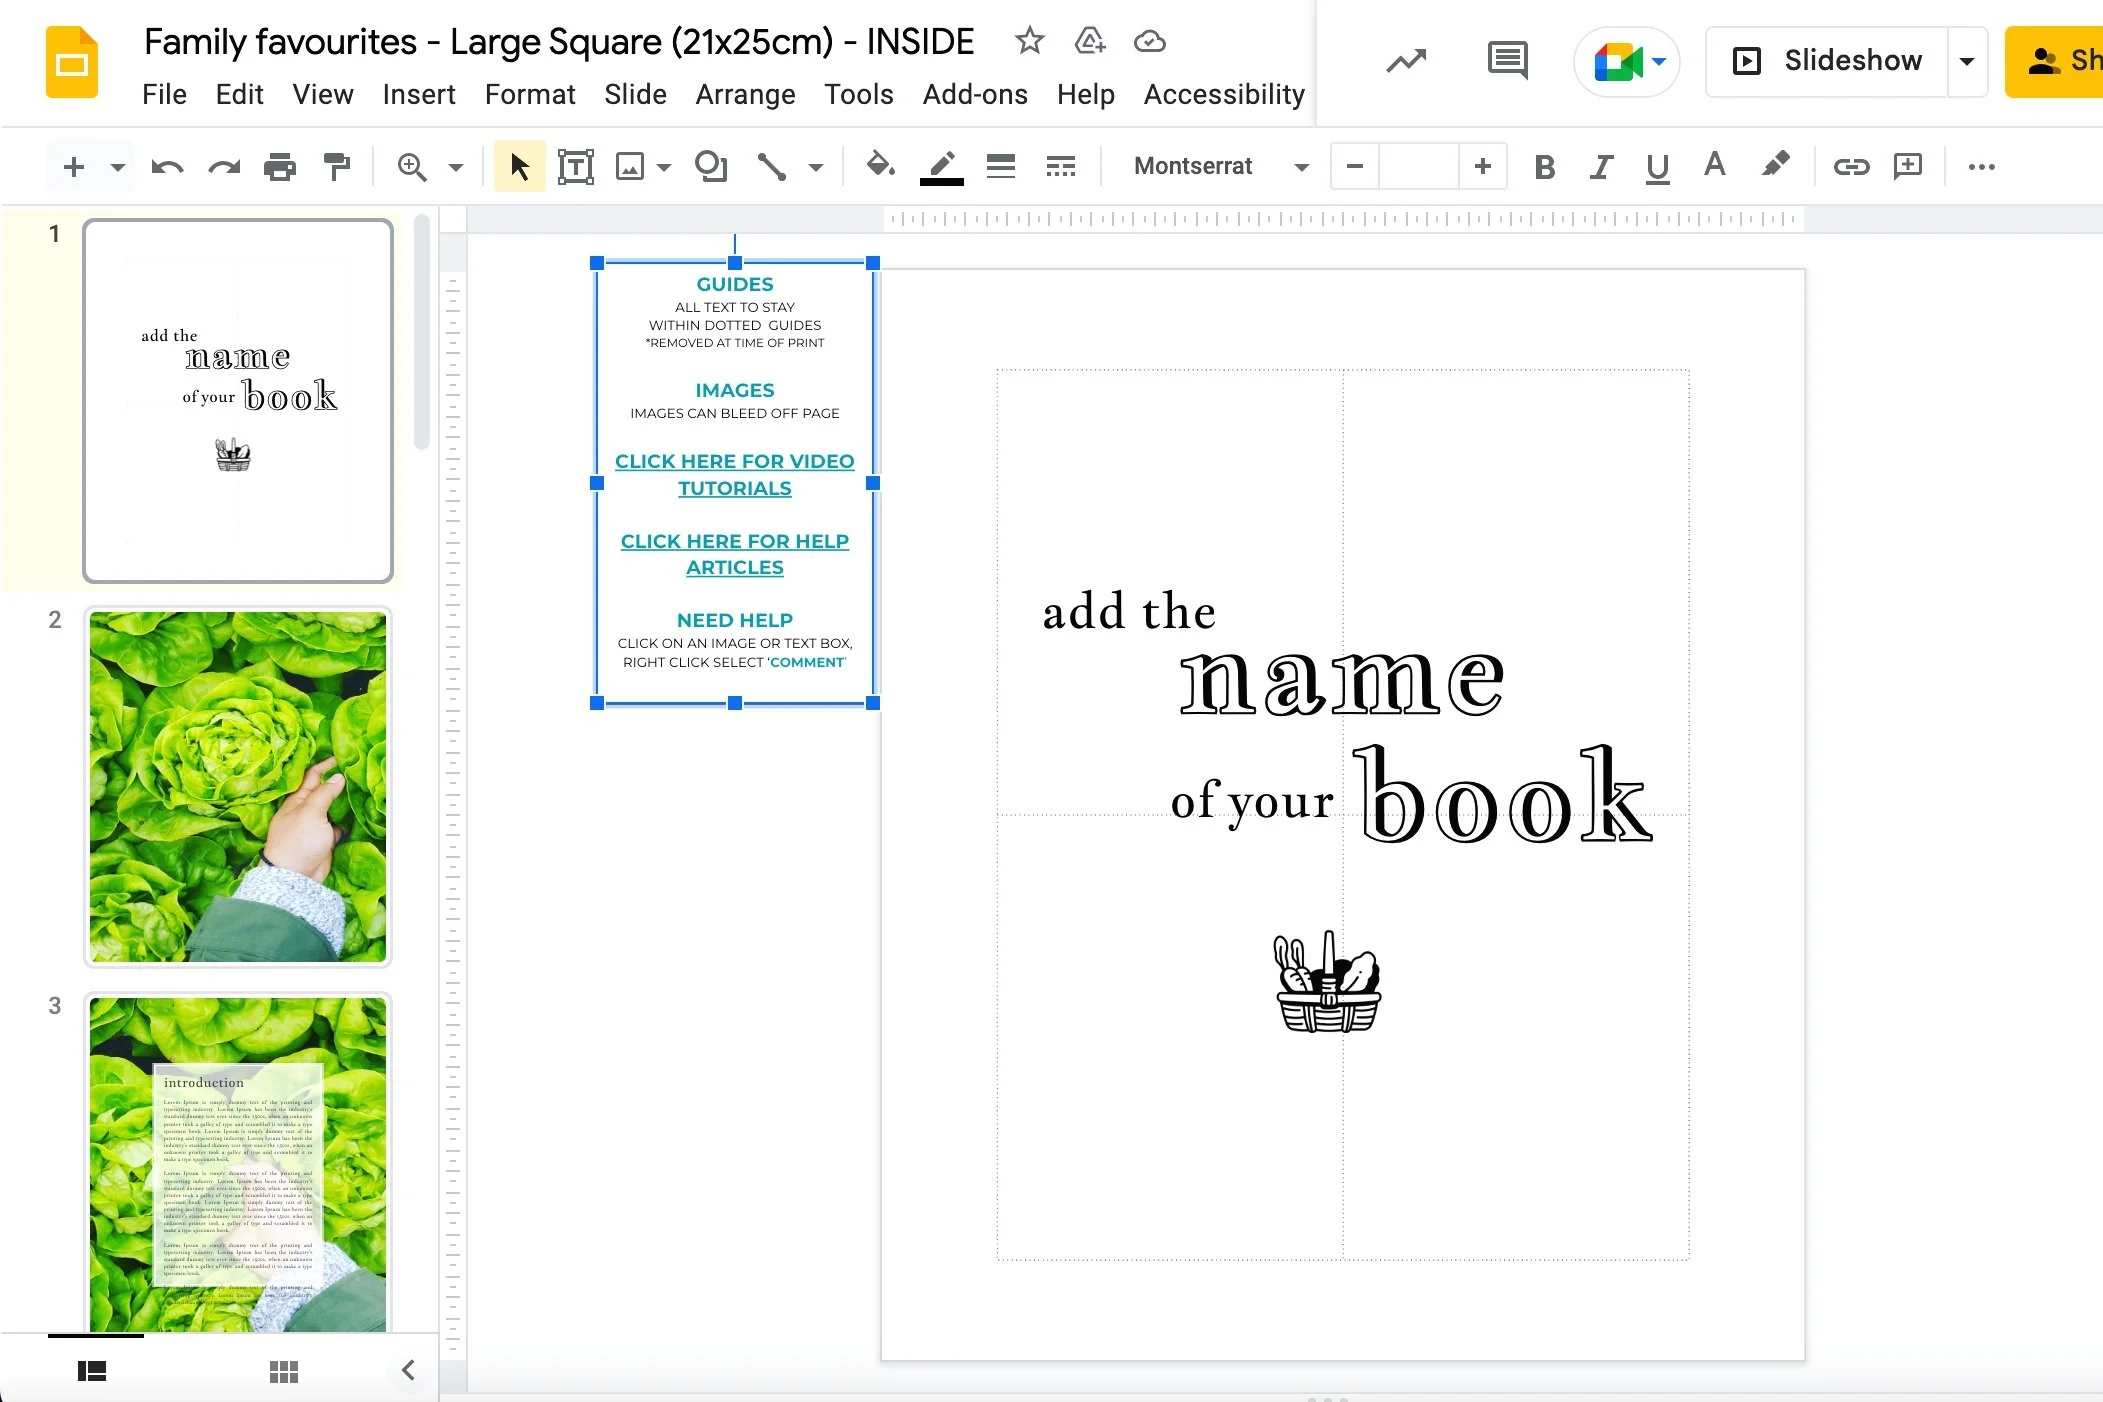
How to edit your cover pages
- Select Cookbook > Layout > Cover.
- PLEASE DO NOT change the THEME in your layout as it is preset by Create Cookbooks with set guides etc.
- ALWAYS turn on the guides before editing: - File > View > Guides. Watch this video tutorial showing you how.
- 5 cover pages consisting of:
- COVER {page/slide 1.}
- You can design this page anyway you like and feature your own image(s), search from our photo food library, and can change the font style, size and position of the cover text.
- Please keep text within the guides.
- INSIDE FRONT COVER {page/slide 2.}
-
With hardback, to be left blank (white) or you can opt for black solid paper.
With the exception of 200+ printed "section sewn" books, endpaper is an option, contact us for more details.
- However, softcover and wirebind, printing on the inside front cover is included.
-
- INSIDE BACK COVER {page/slide. 3}
-
With hardback, to be left blank (white) or you can opt for black solid paper.
With the exception of 200+ printed "section sewn" books, endpaper is an option, contact us for more details.
- However, softcover and wirebind, printing on the inside front cover is included.
-
- BACK COVER {page/slide 4}
- You can design this page anyway you like and feature your own images, images from our photo food library and you can choose any font style.
- Please note that you must keep text within the guides.
- SPINE {page/slide 5}
- The spine text is adjusted by our team after you place your order.
- You can choose your own spine background colour. If not, our team will take a colour spot from your cover and add to your spine.
- COVER {page/slide 1.}
- If you'd like to search for images from our photo library for your front and back cover go to photo library directly inside your template.

Editing recipe pages
- Select Cookbook > Layout > inside pages.
- The first thing you will need to do is move recipes on a page. For example a recipe may have a large introduction telling a story about where the recipe came from so is overlapping the ingredients and method box. These two boxes will need to move down so you can visually see the whole recipe.
- You may also need to cut and paste a portion of a recipe and place it on a new page if the recipe is too long to fit one page.
- You may also decide that some recipes are very small and so you would like to feature 2 or more recipes on a single page
- We highly recommend that you take a few moments to watch these short tutorial videos showing you how to do this step. NOTE you can stop and start or rewind these short 30 second to 1 minute videos to rewatch and don't forget to read the callout text boxes as there is no sound.
- NOTE: for all other articles about how to edit, move, delete and add recipes search our knowledge base. Go to - knowledge base help articles
 ...and select Recipes as per the image below.
 ...and select Recipes as per the image below.
- Select Preview to generate a digital flipbook. Select regenerate to update at any time.
- If you would like to search for images from our photo library for your inside go to photo library directly inside your template.
Editing images
- Select Cookbook > Layout > inside pages.
- If you have uploaded images alongside your recipe in the recipe library, after import you will see that the image has been added to the next page. If you have added more than one image, they are placed off the page on the right where you can move them onto the recipe page, create a collage on a page etc.
- We highly recommend that you take a few moments to watch these short tutorial videos showing you how move, resize, delete and add more personal images and images from our photo library. NOTE you can stop and start or rewind these short 30 second to 1 minute videos to rewatch and don't forget to read the callout text boxes as there is no sound.
- NOTE: for all other articles about how to move, resize, delete and add more personal images and our images, search our knowledge base. Go to - knowledge base help articles...and select Images as per the screenshot below.
-
- Select Preview to generate a digital flipbook. Select regenerate to update at any time.
- If you would like to search for images from our photo library for your inside go to photo library directly inside your template.
Quick links & additional information
- Inside your layout you will see a faint square box, this is there if you do not turn on your guides.
- To the left of each page is a quick link box
- Guides - It lets you know that all recipe and additional text is to stay within the guides. This is for both alignment consistency and so as to also not run the risk of text being cut when we apply trim marks in printed books.
- Trim marks - we remove around 5mm or 0.2 inches from each side of the page for printing purposes. If you generate a preview flipbook of your cookbook the view shows the trim marks already removed so what you see in the preview flipbook is a good representation on how it will be in the final printed book.
- Video tutorials - Click for easy access to these quick videos as guide to help you with editing recipes or images.
- Help articles - Click for easy access to these quick articles as guide to help you with editing recipes or images.
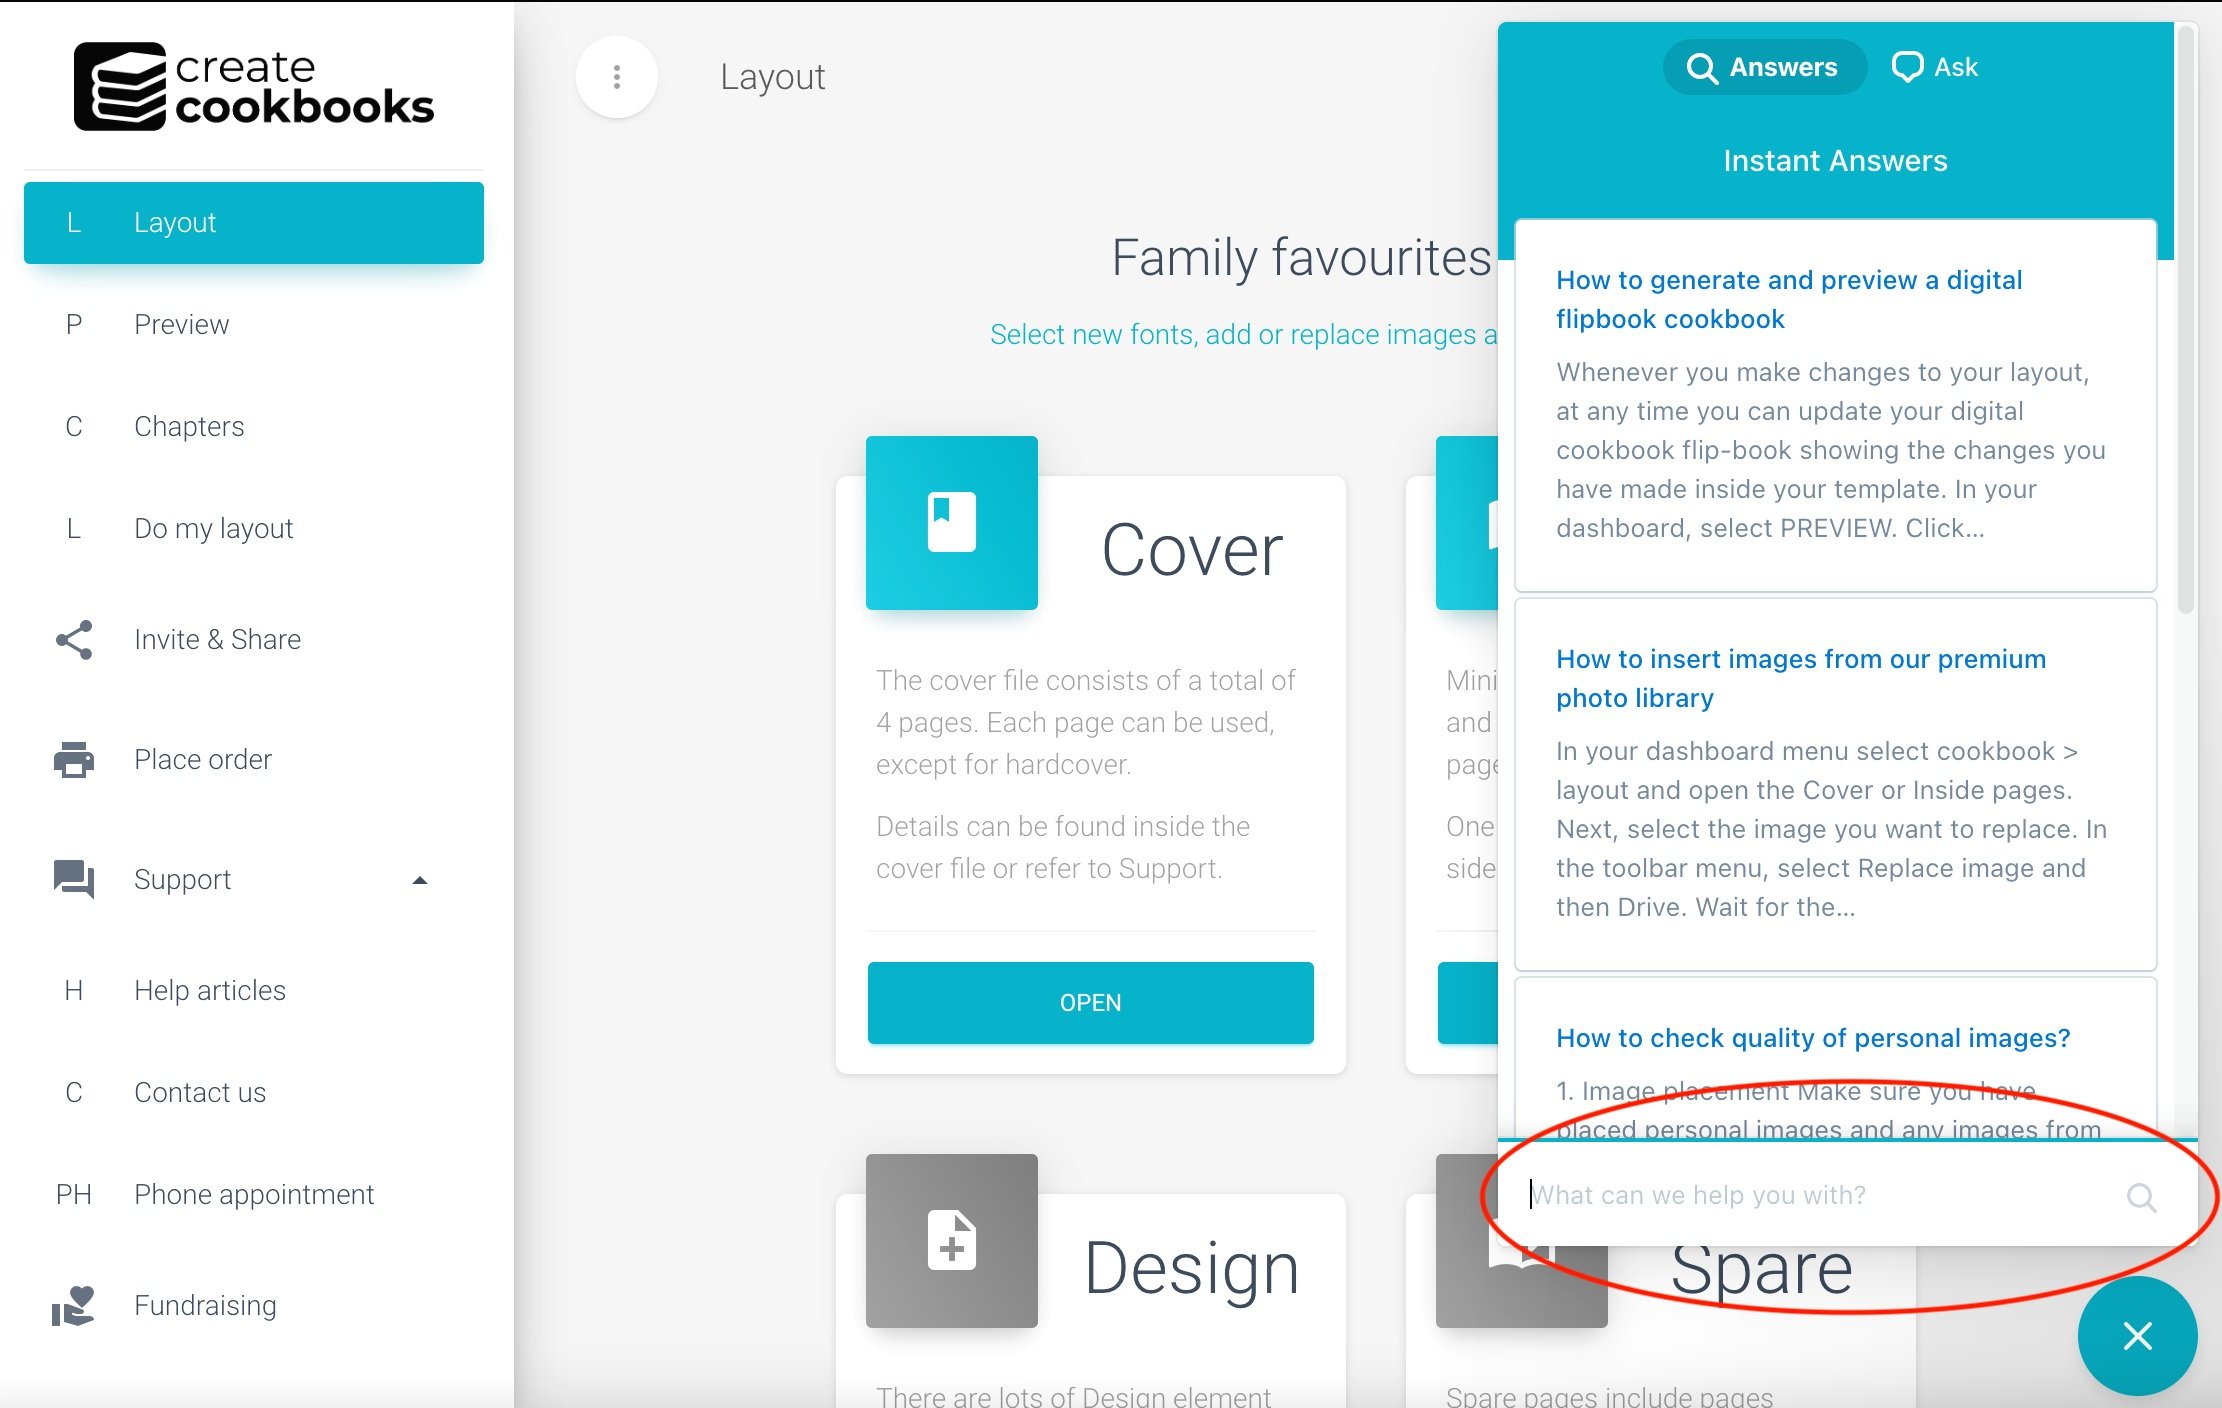
Help is everywhere!
- Select Support inside your dashboard.
- Video tutorials provide quick answers to basic tasks.
These videos are a quick guide. They are designed so you can pause and rewind. - Help articles type a few words to search for most answers you need to add the final touches to your cookbook.
- Communicate with us via the Comment box inside your book to ask a team for help.
- Contact us via the website. We are super-quick with responses.
- Online chat via createcookbooks.com website (chat button bottom right)
- Email us support@createcookbooks.com
- Phone appointments for Community members.
- Next, step 4 - publish.